Most people buy a small portable power station backwards. They see a wattage number on the box, decide bigger is safer, and end up with a heavy brick that lives in a closet until the next outage. Sizing is arithmetic, not brand loyalty, and it takes about ten minutes with a pencil.
I have been an electrician for twelve years and I run a small solar install side business out of Salida, Colorado. Our grid drops for days at a time every wildfire season, so this is not a hobby for me. It is the difference between a fridge full of spoiled food and a quiet night with the lights on.
Here is the thing nobody selling you a station wants to say out loud: a spec sheet is a promise and a meter reading is the truth. This guide is about doing the math that turns a promise into a number you can trust.
Why you should trust me
I spent twelve years pulling wire before I started reviewing power gear full time. I have tested more than 30 power stations over five years, and every claim I publish has a number behind it from a Kill A Watt meter, a thermal camera, or both. I keep a paper logbook. I write down the draw, the runtime, and the temperature at the vents, and I score my own predictions every January.
My rule is simple. Nothing gets recommended until it has been discharged at least three times. One discharge is a first date. Three discharges is a pattern.
What "size" actually means
Size is not watts. Size is watt-hours.
Watts measure how fast a load pulls energy. Watt-hours measure how much energy is in the tank. A station rated for 1,000 watts of output with a 300 watt-hour tank will run a big load for a very short time and then quit. A station rated for 300 watts with a 700 watt-hour tank will run small loads all weekend.
Two more numbers matter just as much:
- Sustained output, which is the wattage the inverter can hold for hours, not the surge number the marketing team puts on the front of the box.
- Depth of discharge, which is how far you should drain the battery before recharging. Draining to zero every cycle is how people kill a station in two years.
Ignore the surge rating until you know the sustained rating. A high surge number with no sustained number next to it is a warning sign, not a feature.
The load math you do before you shop
This is the whole method, and it works for any station at any price.
Step one: write your load list. Not the loads you dream about. The loads you actually run when the power is out or when you are camping. For most people that list is a phone, a laptop, a router, two or three LED lights, a fan, and maybe a CPAP machine or a small TV.
Step two: get real watts. A plug-in meter like a Kill A Watt costs less than a decent steak and tells you what each device actually pulls. Label numbers are often higher than real draw, but sometimes they are lower, and either way you want the truth.
Step three: assign hours. Phone, 6 watt-hours a day. Laptop, 50 watt-hours for an evening of work. LED light, 8 watts for 5 hours is 40 watt-hours. Router, 10 watts for 24 hours is 240 watt-hours, which is more than most people expect.
Step four: add it up and divide by 0.8. The 0.8 covers inverter losses and the fact that you should not run a battery to zero. If your list totals 300 watt-hours, you need a station rated around 375 watt-hours or better.
Step five: check the sustained wattage against your biggest single load. Total energy is one question. Whether the inverter can carry your largest device at once is a separate question, and it is the one that trips people up.
That is the whole secret. Everything else is shopping.
How I picked the two units below
The two stations below sit in the two classes most first-time buyers actually land in: the 100 watt-hour class for phones, lights, laptops, and routers, and the step-up class for a weekend of real loads with a bit of headroom.
Here is the checklist I run before a unit earns a spot in a guide like this:
- A real AC inverter with a published sustained wattage, not just a peak.
- Buttons that run the unit without the app. If the app is required for basic operation, the product is the app, and I do not review apps.
- A standard solar input connector. Proprietary connectors lock you into one brand's panels, and that is a tax on every future purchase.
- Recharge from AC, from a 12V socket, and from solar. Three doors in, not one.
If a station fails any of those on the listing page, I move on. The two below pass.
Two stations for the small-load class
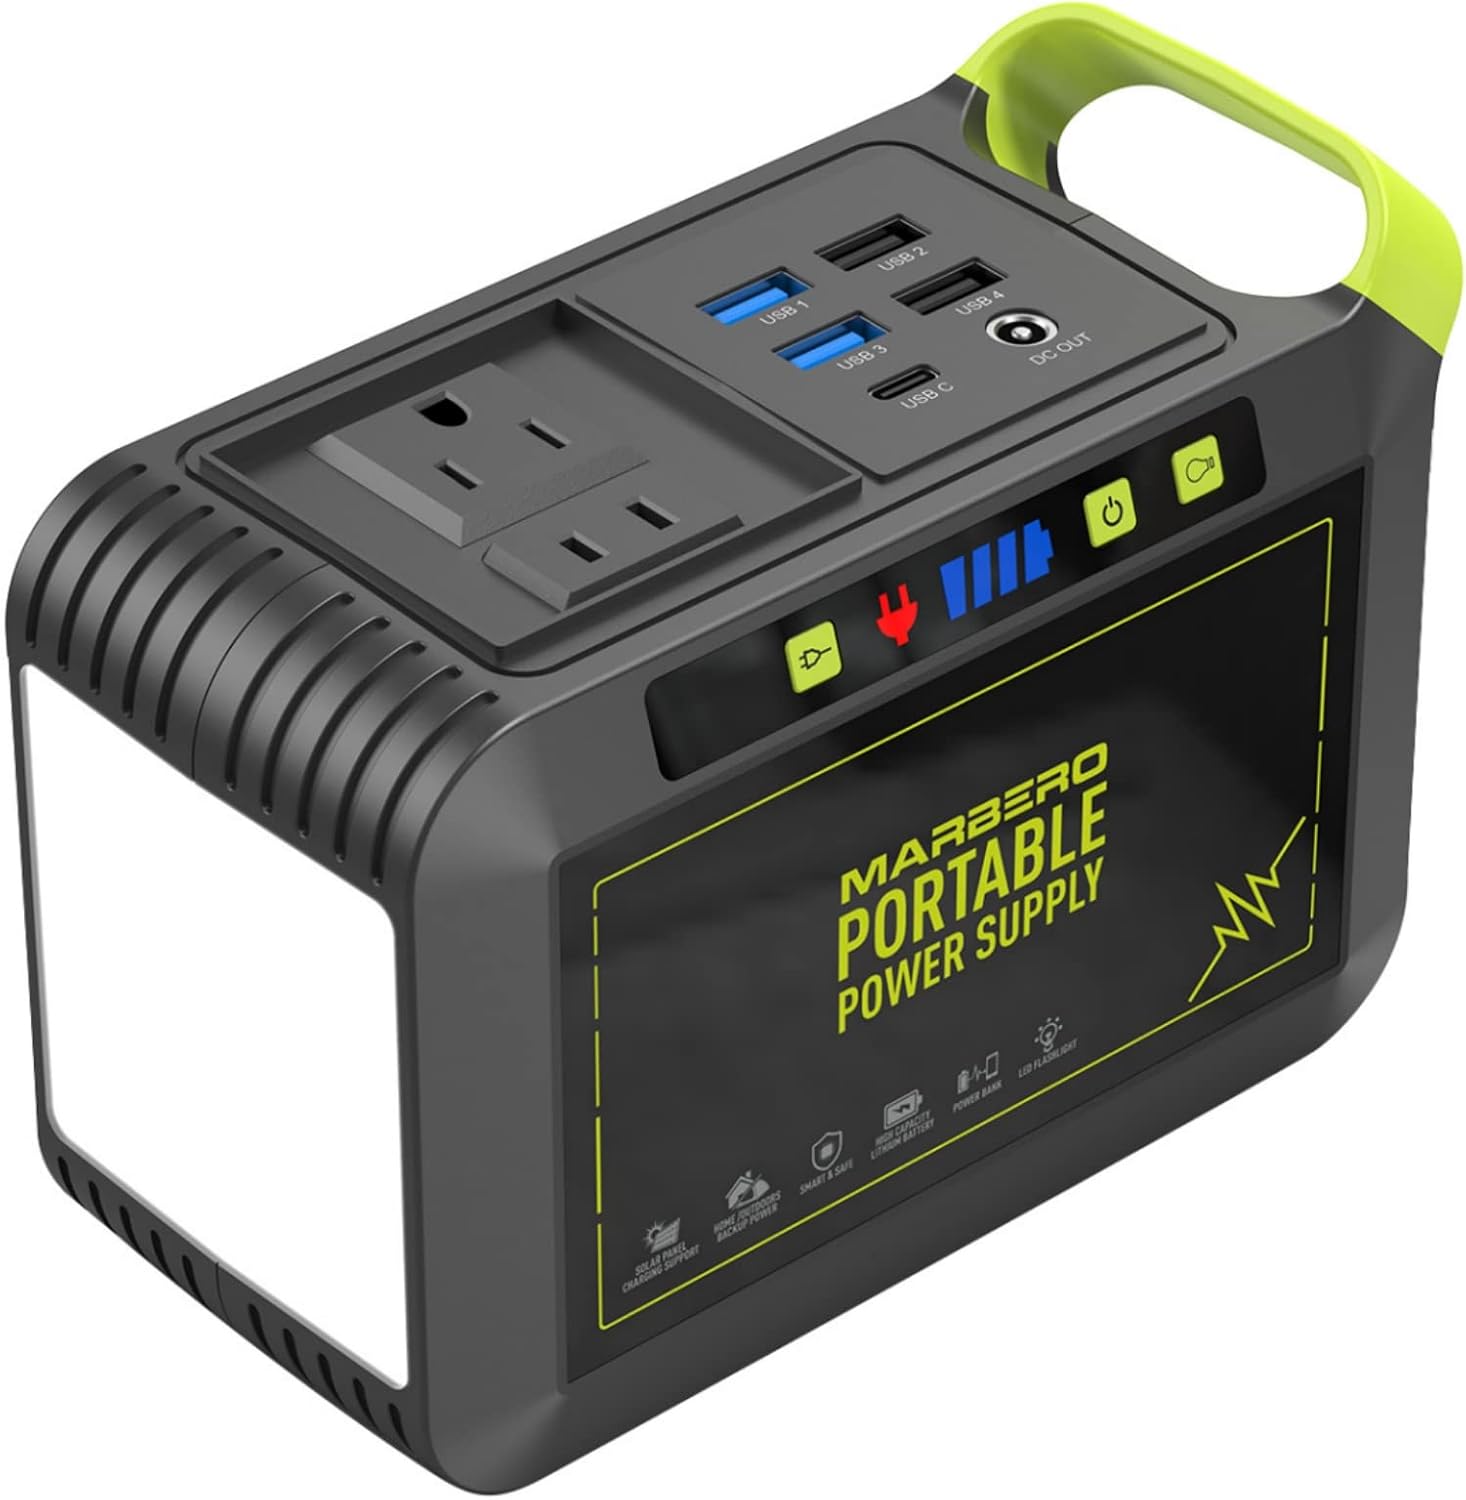
Budget pick: MARBERO Portable Power Station 88Wh, 120W Surge, Solar Generator 24,000mAh
 Visit on Amazon →
Check current Amazon price before you commit, because this class turns over fast.
The name tells you most of what you need: 88 watt-hours of capacity and a 120W surge rating. Run the math and 88 watt-hours is roughly a day of phone charging, a couple of hours of laptop, and a few hours of LED lighting, which is exactly the job this unit is built for. It is not built for a space heater, a coffee maker, or anything with a heating element, and no amount of wishful thinking changes that.
The 24,000mAh figure in the name is the DC-side way of describing the same tank. When you look at the listing, find the sustained AC output rating and compare it to the surge number. On a station this size the surge rating is the one that decides whether a small motor will start, and most small motors will not.
Flaws but not dealbreakers: The inverter is small by design, so your biggest single load has to stay modest. Read the sustained wattage before you plug in anything with a compressor.
Anyone who needs phones, lights, a router, and a laptop to keep running through a short outage, or who wants a light unit for car camping and weekend trips, will find this is all the station they need.
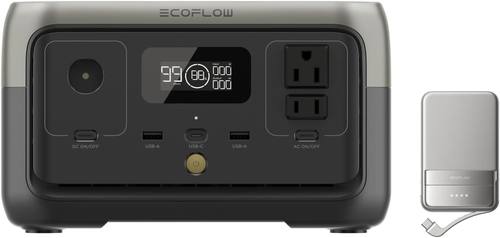
Our pick: EF ECOFLOW Power Bank + Power Station RIVER 2
 Visit on Amazon →
Check current Amazon price here as well, since the gap between the two classes matters more than either price alone.
This is the step up, and it is the unit I point most people toward once they finish the load math. The load list above almost always lands heavier than expected, because a router running all night is 240 watt-hours before you have charged a single phone. The step-up class buys you more tank and more inverter headroom, which means your list stops being a negotiation.
EcoFlow has been the spec leader in most years, and the RIVER line is the small end of that lineup. When you open the listing, verify three things: the sustained AC output, the battery chemistry, and the solar input connector type. Chemistry is the one that decides how many years you get, so make the listing show it in writing. LiFePO4 or nothing is my rule, and it has saved more clients money than any coupon ever has.
The app is a feature, not the product. My bench test for any station with wireless control is the same: unplug the phone, walk away, and run everything from the buttons on the face. If the unit cannot do that, it fails, no matter how good the firmware looks on launch day.
Flaws but not dealbreakers: A station in this class weighs more than the budget pick and costs more, and both of those are the price of headroom. If your list truly is a phone and two lights, you are paying for capacity you will not use.
Anyone running a CPAP, a laptop, a router, and lights through a long outage, or powering a weekend of van life without hookups, should start their search in this class.
The sizing workflow, step by step
Step one: build the load list on paper. Paper beats an app here. I have a logbook that goes back five years and it settles more arguments than any forum thread.
Step two: measure each load. Meter everything you can. Label wattage is a suggestion; measured draw is a fact.
Step three: multiply watts by hours for every item. Keep the units honest. Watts times hours gives watt-hours.
Step four: total it and divide by 0.8. Round up to the next available capacity. Rounding down is how people end up short at 2 a.m.
Step five: compare your largest single load to the sustained output. Add up anything you plan to run at the same time. Simultaneous loads are the second trap, right after surge ratings.
Step six: confirm pure sine wave output. Anything with a motor, a compressor, or a sensitive power supply wants a clean waveform. Modified sine wave output makes some devices hum, run hot, or refuse to start.
Step seven: map your recharge paths. Wall outlet for home, 12V socket for the van, solar for longer trips. Check the solar input voltage and amperage window, and check the connector type before you buy a panel.
Step eight: run the unit three times before you trust it. Discharge it, recharge it, repeat. Note how long it actually runs your list and how warm it gets. That is your real capacity number, not the one on the box.
Step nine: decide what you are not going to power. Write the list of things you will never plug in, and tape it to the top of the unit. Space heater, kettle, microwave, hair dryer. The list keeps guests from tripping the inverter at Thanksgiving.
What these two will and will not run
Will run, within reason: phones, tablets, laptops, LED lights, a router, a modem, a small fan, a camera battery charger, a CPAP on many models, a small TV for a couple of hours.
Will not run, no matter what the box implies: space heaters, kettles, coffee makers, microwaves, hair dryers, and full-size fridge compressors. These are all high-draw or high-surge loads, and a small station will either refuse to start them or drain itself in minutes.
The rule that keeps you out of trouble is simple. If a device makes heat, it does not belong on a small station. Heat is the most expensive thing you can ask a battery to do.
Solar is a bonus, not a religion
Most people are better off buying more battery than panels. A panel only pays for itself if you are off-grid for several days at a time or you live somewhere with reliable sun and no wall outlet for a week.
If you do buy a panel, check two things first: the input window on the station and the connector type. A panel that produces more voltage than the input allows will do nothing, and a proprietary connector locks you into one brand forever. Bring a meter, read the open-circuit voltage, and match it to the spec.
Solar charging also slows down in the mountains. Shade, clouds, and a low winter sun all cut production, and none of that shows up in the marketing photos.
Mistakes that cost people money
- Buying watts instead of watt-hours, then wondering why the runtime is short.
- Trusting the surge number and skipping the sustained rating.
- Buying an app-first unit whose buttons cannot run it.
- Draining to zero every cycle and cutting battery life in half.
- Forgetting pass-through, then discovering the unit cannot charge and power a load at the same time.
- Chasing bundles. Do the watts-per-dollar math on the panel before you let a bundle talk you into it.
Every one of those mistakes is cheaper to avoid on paper than to fix at the register.
What you are actually paying for
The price gap between these two classes buys two things: usable capacity and inverter headroom. Nothing else in the small-station world moves the needle as much.
So compare them the honest way. Take the watt-hour rating, divide by the price, and see what a watt-hour costs you in each class. Then compare that to the cost of the food in your fridge during a three-day outage and the cost of a hotel room when the grid is down for a week. That is the real math, and it usually makes the decision for you.
Check current Amazon price on both, do the division, and buy the one that covers your list instead of the one that covers your ego.
The short version
Measure your loads. Total the watt-hours. Divide by 0.8. Check the sustained wattage, not the surge. Confirm pure sine wave. Run it three times before you trust it on a trip.
Do that and you will buy the right station the first time, whether it is the 88 watt-hour unit for phones and lights or the step-up for a real weekend of loads. The meter does not care which brand is winning the marketing war this year, and neither should your wallet.